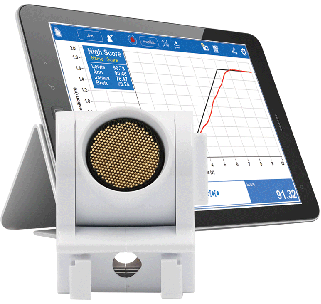
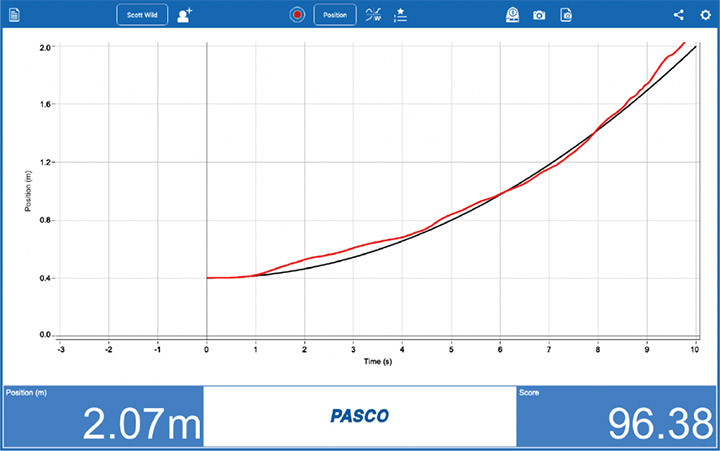
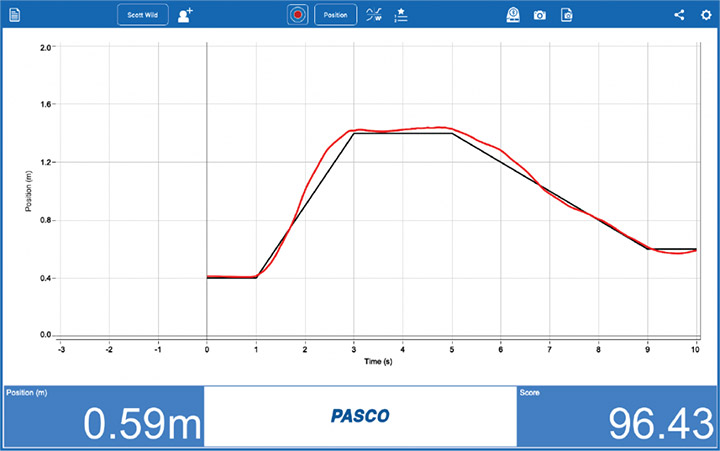
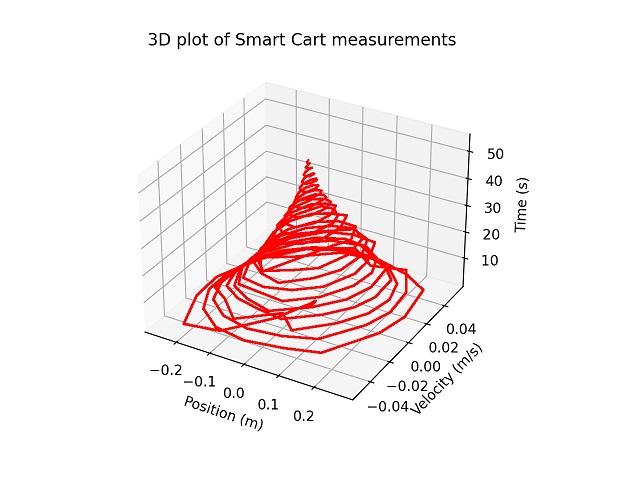
MatchGraph software is the most intuitive way to teach motion graphing. Engage your students with a kinesthetic experience that teaches graphing centered on motion. In MatchGraph, students attempt to match one of the nine provided graphs and are given a score showing how accurately they match their chosen curve. This activity gives them a deeper understanding of interpreting graphs as they see their own position and velocity graphed in real time.
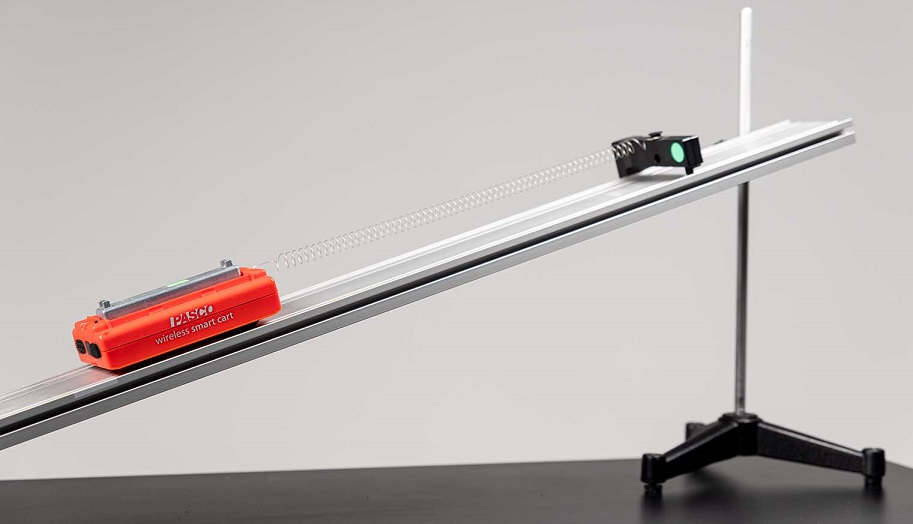
When students use a PASCO Motion Sensor, they can create graphs of their own motion that they can then analyze. When they use a Smart Cart, students view real-time graphs of a cart they move.
MatchGraph is great for teaching:
Fundamental graphing skills
Basic concepts of position and velocity
The concept of slope
What it means when the slope is zero
How position and velocity graphs relate to each other
MatchGraph is compatible with:
PASCO Wireless Motion Sensor
PASCO Wireless Smart Cart
PASPORT Motion Sensor with a PASCO Interface
ScienceWorkshop Motion Sensor with a PASCO Interface
MatchGraph Screens
When students see their motion graphed in real time, it helps them quickly internalize and understand concepts around motion graphs.
The relationships between position, velocity, and acceleration are easier to understand when presented visually and connected to motion.
The MatchGraph Toolbar
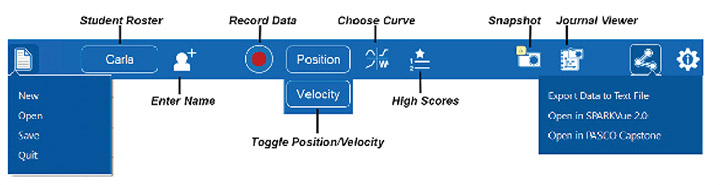
MatchGraph has an intuitive user interface that allows teachers and students to simply set up and begin matching immediately. You can add students, view high scores, export data, and more with a simple click or touch.
Toggle Between Position and Velocity
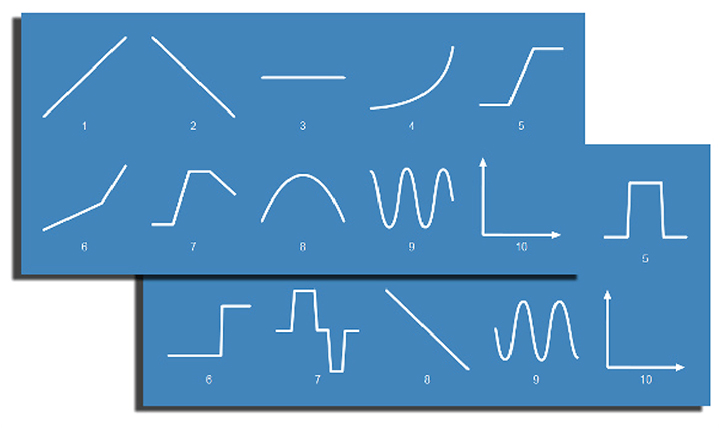
Students can choose from nine different position profiles and their derivative velocity curves. MatchGraph also allows students to collect position and velocity data freely, without using a MatchGraph profile.
Turn science learning into a class activity.
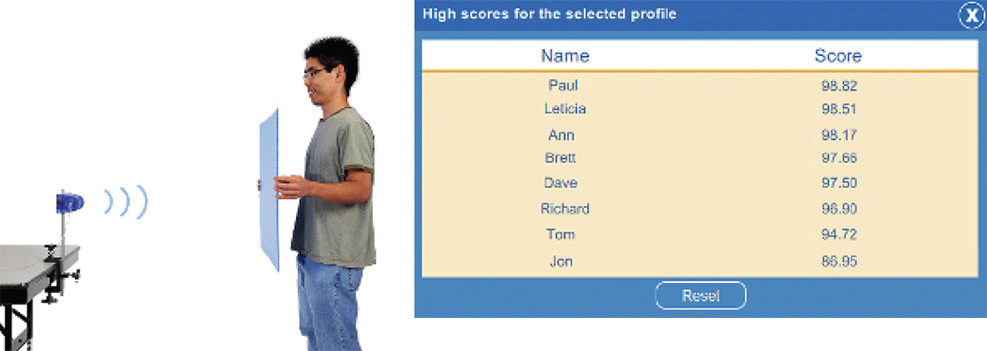
MatchGraph creates a fun and competitive way to let students experience the concepts of motion graphing as well as rate of change. Enter student names and keep track of individual scores for each curve. High scores are tracked for each individual MatchGraph profile.
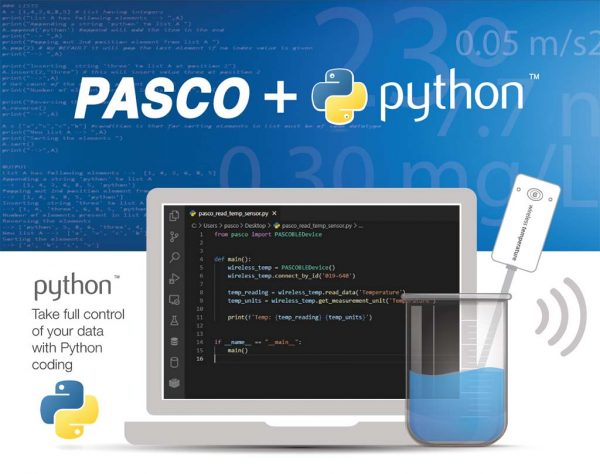
The PASCO Python Library lets learners, educators, and hobbyists take full control of their PASCO Wireless Sensors using Python code. Visit us on GitHub to download the PASCO Python API, browse sample code, and review tips for getting started.
Why Python?
Python is used in schools and universities around the world.
It’s simple, readable, and flexible, making it ideal for both beginners and experts.
Python resources are readily accessible thanks to its global community of creators, collaborators, and problem-solvers.
Python vs. Blockly
Blockly is an easy-to-use, block-based programming platform available in both SPARKvue and PASCO Capstone. Unlike Blockly, Python is a text-based programming language that is independent from PASCO software. This library lets you bring Python into the PASCO ecosystem for complete control of your data. With Python, users control all aspects of sensor data collection, from sensor connections and sampling rates to data displays and custom analytics.
Visit us on GitHub to view instructions for getting started and browse sample code for Python projects.
Compatible Sensors
//code.Node
Smart Cart
Wireless Acceleration Altimter
Wireless CO2
Wireless Conductivity
Wireless Current
Wireless Diffraction
Wireless Drop Counter
Wireless Force Acceleration
Wireless Light
Wireless Load Cell
Wireless Magnetic Field
Wireless Motion
Wireless O2
Wireless Optical Dissolved Oxygen
Wireless pH
Wireless Pressure
Wireless Rotary Motion
Wireless Temperature
Wireless Voltage
Wireless Weather
System Requirements
Operating Systems: Windows, Mac, Linux (Raspberry Pi)
Bluetooth 4.0+
Python version 3.7-3.10
IDE of your choice (VSCode, PyCharm, etc)
Example Projects
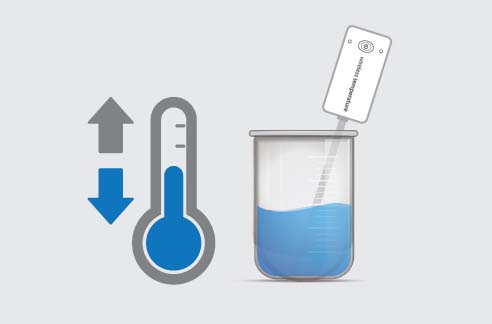
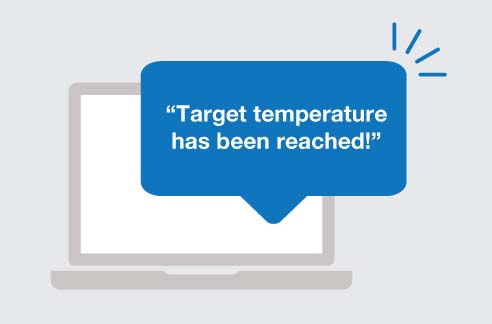
Temperature Alarm
Use a Python text to voice plugin to narrate temperatures out loud.
Friday, Aug 6th, 2021 @ 12:00 pm Eastern / 9:00 am Pacific
PASCO Day of Physics
PASCO Day of Physics is back! Join us this Friday as we kick off the new school year with an exciting collection of demos, apparatus, and phenomena. We’ll begin live streaming on Facebook and YouTube at 12 pm (EST) 9 am (PST), and will continue to stream until we’re out of demos and questions!
We are thrilled to announce that the //code.Node Solution Set has won a Bett Award! Based in London, the Bett Awards are an international celebration of the inspiring creativity and innovation found throughout educational technology. It is truly an honor to have our innovation in STEM coding recognized among the best and brightest in educational technology. You can check out the judges’ comments below!
The //code.Node Solution Set provides teachers with a revolutionary method for engaging students in coding and computational thinking in science learning. Rather than simply teaching students how to code, the //code.Node Solution Set skillfully scaffolds coding into essential science concepts, making it easy for students to build a wide range of competencies as they use code to investigate, measure, and analyze scientific phenomena.
The complete set includes a //code.Node, a //code.Node Holder, SPARKvue software with Blockly coding, a digital teacher’s manual, and an interactive, browser-based flipbook with embedded videos and reading for students. Browse the Flipbook for free here.
Here’s what the judges at the 2021 Bett Awards had to say about the //code.Node Solution Set:
This compact device, with its many built-in sensors offers versatility across STEM subjects and many opportunities for students to learn through hands on activities which relate to everyday science. The support videos embedded in the manual are also helpful for teachers to gain ideas for use in lessons.
Since entering the 2021 Bett Awards, we’ve continued our innovation with STEM Sense — an exciting new line of ready-to-use solutions designed to help educators integrate computational thinking, crosscutting concepts, and career awareness into science learning. You can explore our growing line of STEM Sense solutions here.
The popular wireless pH sensor is a great sensor with many applications for Chemistry, Biology, Environment Science and General Science. However, to experience the many benefits of this sensor, it is recommended that time is set aside to understand the sensor’s proper operation and care. Fortunately there are a number of fantastic resources available to minimize the learning curve. The purpose of the following information is to emphasize key points and highlight the most helpful resources.
Important information before getting started
The pH sensor is comprised of two components: 1) The Amplifier (aka the white Bluetooth box, and 2) The Electrode. Please note that many of the support calls for this sensor relate to improper connection of the Electrode to the Amplifier. (How to properly connect the pH electrode). The white PASCO Amplifier is backed by PASCO’s 5 year warranty. The Electrode, which is manufactured by a 3rd party, features a 3 month warranty against defects (but not improper use). Despite this shorter warranty period, with proper care and attention the electrodes can be maintained in good working order for many years.
Manual
A comprehensive user manual exists for all PASCO’s wireless sensors (as well as other products). But printed manuals are not supplied with the sensors – PDF files of the manuals can be downloaded from the Find Product Manuals and Resources search engine. For your convenience the pH manual can be directly viewed by clicking on the following link:
Wireless pH Reference Guide
This comprehensive guide is an excellent resource to learn how to care for and operate your pH sensor.
Key points from the reference guide not to be overlooked when getting started
It’s recommend to read the entire manual thoroughly, including the insightful section on the theory of calibration. The better you understand how the pH sensor records calibrated measurements, the less of a black box it becomes, and the greater likelihood you’ll achieve accurate results. However, if time is limited, be certain to pay attention to the following:
PASCO continues to expand its very helpful collection of task specific videos. These videos are developed by their teacher support department and address common software and sensor concerns. The best place to view these videos is on PASCO’s YouTube channel as it features an effective search tool. For pH, there are a number of very useful videos on this channel with the most important ones linked below:
PASCO products are made with a variety of materials, and each material might have specific cleaning requirements. The following applies to all products:
Unplug all external power cables and devices before attempting to clean a product.
Only use alcohol based disinfectants. Take care to use these cleaning solutions far from any ignition sources.
Never spray cleaners directly onto a product or put liquids directly onto a product. Always use a damp cloth.
Do not overly saturate the cloth. Don’t get moisture into any openings.
Don’t submerge any product in any cleaning agents.
Don’t use aerosol sprays, bleach, ammonia based solutions, or abrasives.
Don’t use on fabric or leather surfaces.
Using a 70 percent isopropyl alcohol wipe or mix or Clorox Disinfecting Wipes is generally safe. You may gently wipe the hard, nonporous surfaces of your PASCO product, such as the display, buttons, or other exterior surfaces.
Warranty: Liquid damage or damage cause by harsh (unauthorized) chemicals or cleaning methods is not covered under the PASCO product warranty. For any concerns or questions in regard to cleaning a specific PASCO product, please contact PASCO Technical Support for further guidance.
Host Mike Paskowitz will be demonstrating live experiments using his favourite PASCO product, the Materials Testing System. Mike will take you beyond simple load-displacement curves using a thermal camera, microscope, and video analysis to complete in-depth sample analysis. Don’t miss your chance to participate in this live investigation of sample tension and bending.
The PASCO Materials Testing System(MTS) includes everything needed to do tensile testing straight out of the box. With 6 different versions there are options to fit every budget! The educationally designed MTS is ideal for kinesthetic learning as the manually driven crank enables students to “feel” the strength of the material. Students can accurately & easily test material compression, column buckling, shearing, three and four-point bending, photo-elasticity, cyclic deformation & more.
To support educators and students as they transition to remote learning during the COVID-19 school closures, we are granting free access to the Essential Physics 3rd Edition Student e-Book and Teacher e-Resources for the remainder of the 2020 school year. The Student e-Book includes a full year of curriculum that can be used for high school, AP, IB, and algebra-based courses.
To request your teacher access code please complete the form below.
Marie Claude Dupuis
I have taught grade 9 applied science, science and technology, grade 10 applied, regular and enriched science, grade 11 chemistry and physics for 33 years at Westwood Senior High School in Hudson Québec. I discovered the PASCO equipment in 2019 and it completely changed my life. I love to discover, produce experiments and share discoveries. I am looking forward to work with your team.
Christopher Sarkonak
Having graduated with a major in Computer Science and minors in Physics and Mathematics, I began my teaching career at Killarney Collegiate Institute in Killarney, Manitoba in 2009. While teaching Physics there, I decided to invest in PASCO products and approached the Killarney Foundation with a proposal about funding the Physics lab with the SPARK Science Learning System and sensors. While there I also started a tremendously successful new course that gave students the ability to explore their interests in science and consisted of students completing one project a month, two of which were to be hands-on experiments, two of which were to be research based, and the final being up to the student.
In 2011 I moved back to Brandon, Manitoba and started working at the school I had graduated from, Crocus Plains Regional Secondary School. In 2018 I finally had the opportunity to once again teach Physics and have been working hard to build the program. Being in the vocational school for the region has led to many opportunities to collaborate with our Electronics, Design Drafting, Welding, and Photography departments on highly engaging inter-disciplinary projects. I believe very strongly in showing students what Physics can look like and build lots of demonstrations and experiments for my classes to use, including a Reuben’s tube, an electromagnetic ring launcher, and Schlieren optics setup, just to name a few that have become fan favourites among the students in our building. At the end of my first year teaching Physics at Crocus Plains I applied for CERN’s International High School Teacher Programme and became the first Canadian selected through direct entry in the 21 years of the program. This incredible opportunity gave me the opportunity to learn from scientists working on the Large Hadron Collider and from CERN’s educational outreach team at the S’Cool Lab. Following this, I returned to Canada and began working with the Perimeter Institute, becoming part of their Teacher Network.
These experiences and being part of professional development workshops with the AAPT and the Canadian Light Source (CLS) this summer has given me the opportunity to speak to many Physics educators around the world to gain new insights into how my classroom evolves. As I work to build our program, I am exploring new ideas that see students take an active role in their learning, more inter-disciplinary work with departments in our school, the development of a STEM For Girls program in our building, and organizing participation in challenges from the ESA, the Students on the Beamline program from CLS, and our local science fair.
Meaghan Boudreau
Though I graduated with a BEd qualified to teach English and Social Studies, it just wasn’t meant to be. My first job was teaching technology courses at a local high school, a far cry from the English and Social Studies job I had envisioned myself in. I was lucky enough to stay in that position for over ten years, teaching various technology courses in grades 10-12, while also obtaining a Master of Education in Technology Integration and a Master of Education in Online Instructional Media.
You will notice what is absent from my bio is any background in science. In fact, I took the minimum amount of required science courses to graduate high school. Three years ago I switched roles and currently work as a Technology Integration Leader; supporting teachers with integrating technology into their pedagogy in connection with the provincial outcomes. All of our schools have PASCO sensors at some level (mostly grades 4-12) and I made it my professional goal to not only learn how to use them, but to find ways to make them more approachable for teachers with no formal science background (like me!). Having no background or training in science has allowed me to experience a renewed love of Science, making it easier for me to support teachers in learning how to use PASCO sensors in their classrooms. I wholeheartedly believe that if more teachers could see just how easy they are to use, the more they will use them in the classroom and I’ve made it my goal to do exactly that.
I enjoy coming up with out-of-the-box ways of using the sensors, including finding curriculum connections within subjects outside of the typical science realm. I have found that hands on activities with immediate feedback, which PASCO sensors provide, help students and teachers see the benefits of technology in the classroom and will help more students foster a love of science and STEAM learning.
Michelle Brosseau
I have been teaching since 2009 at my alma mater, Ursuline College Chatham. I studied Mathematics and Physics at the University of Windsor. I will have completed my Professional Master’s of Education through Queen’s University in 2019. My early teaching years had me teaching Math, Science and Physics, which has evolved into teaching mostly Physics in recent years. Some of my favourite topics are Astronomy, Optics and Nuclear Physics. I’ve crossed off many activities from my “Physics Teacher Bucket List”, most notably bungee jumping, skydiving, and driving a tank.
Project-based learning, inquiry-based research and experiments, Understanding by Design, and Critical Thinking are the frameworks I use for planning my courses. I love being able to use PASCO’s sensors to enhance the learning of my students, and make it even more quantitative.
I live in Chatham, Ontario with my husband and two sons.