Can You Beat a Robot at Tic Tac Toe?
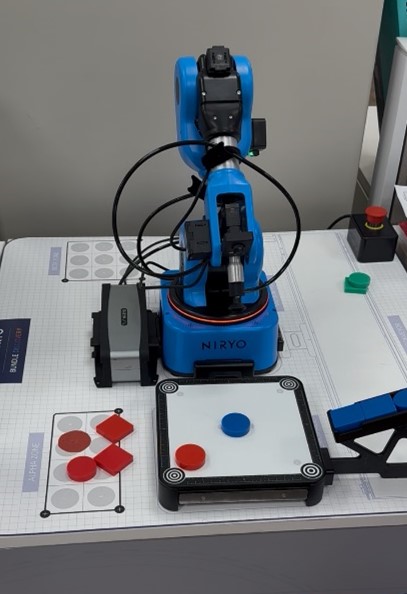
Tic-Tac-Toe is a classic game, but when it’s played by the Niryo Ned2, a 6-axis robotic arm, it becomes something much more. Designed for education and research, the Ned2 transforms this simple game into a hands-on demonstration of robotics concepts like vision processing, decision-making, and real-time control.
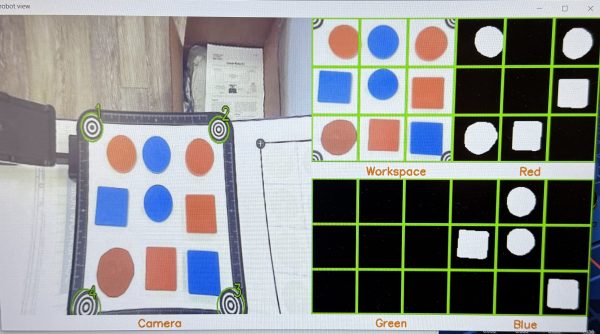 In this project, the Ned2 is fitted with a camera mounted on its wrist, giving it the ability to see. Once the workspace is calibrated, the robot can recognize the board layout and locate game pieces using visual data. The setup includes two sets of colored pawns, which the robot picks and places using a vacuum gripper. The robot captures an image, identifies the positions of the pawns, and maps this information onto a 3×3 digital grid that represents the current state of the game.
One of the standout features of this system is that you can adjust the difficulty level of the robot. Beginners can face a more relaxed opponent that plays randomly or with limited strategy, while more advanced users can test their skills against a version that plays nearly flawlessly. This flexibility makes the Ned2 a great fit for users at all levels, from beginners to advanced programmers.
 Once the robot decides on its move, it picks up a game piece using a vacuum gripper and places it carefully in the selected cell. After each human turn, the process repeats. The robot takes a new image, updates its internal board, plans the next move, and takes action. This ongoing loop brings together all parts of the robotics pipeline, combining sensing, planning, and physical action in a way that is easy to observe and understand.
What makes this application especially impactful is how it connects theory to practice. Students can immediately see how their programming choices affect the robot’s actions, giving them a clear, real-world view of how code drives behavior.
Of course, some players might be tempted to test the robot’s limits by bending the rules. But be warned: if you try to cheat, the Ned2 might notice. And if it does, you may be in for a surprise.
Beyond its educational purpose, the Tic-Tac-Toe demo is simply fun to watch. Seeing a robot compete in a familiar game captures attention and encourages users to tweak the system, explore new strategies, or even build their own versions. See all the different scenarios and outcomes here!
By blending simplicity with technical depth, the Niryo Ned2 turns a childhood game into a powerful robotics learning platform. Whether you’re teaching, experimenting, or just curious, it offers an accessible and creative way to explore how machines interact with the world.