Description
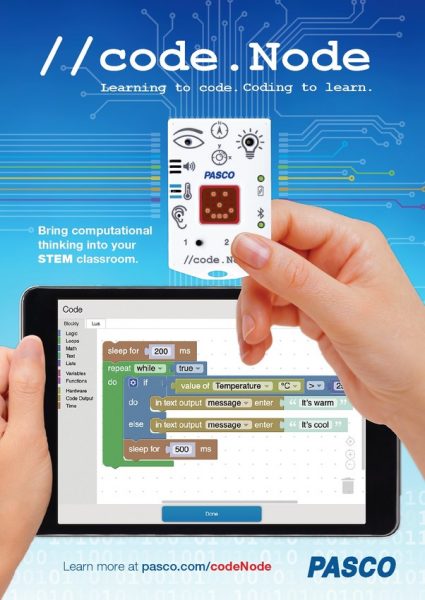
The //code.Node is a turnkey coding solution that combines real-world sensor inquiry, Blockly coding, and live data displays to drive computational thinking in STEM learning. It includes six interactive sensors and four device outputs that measure and respond to phenomena using code created in SPARKvue or Capstone software.
Today’s students live in a digital world full of sensors and devices driven by code. From automatic nightlights to emergency braking systems, sensors play an integral role in everyday life. With the //code.Node and Blockly coding, students can learn about sensors, their applications, and the code that controls them. Each //code.Node activity challenges students to create an interactive program with external responses that bring their code beyond the screen to the real world.
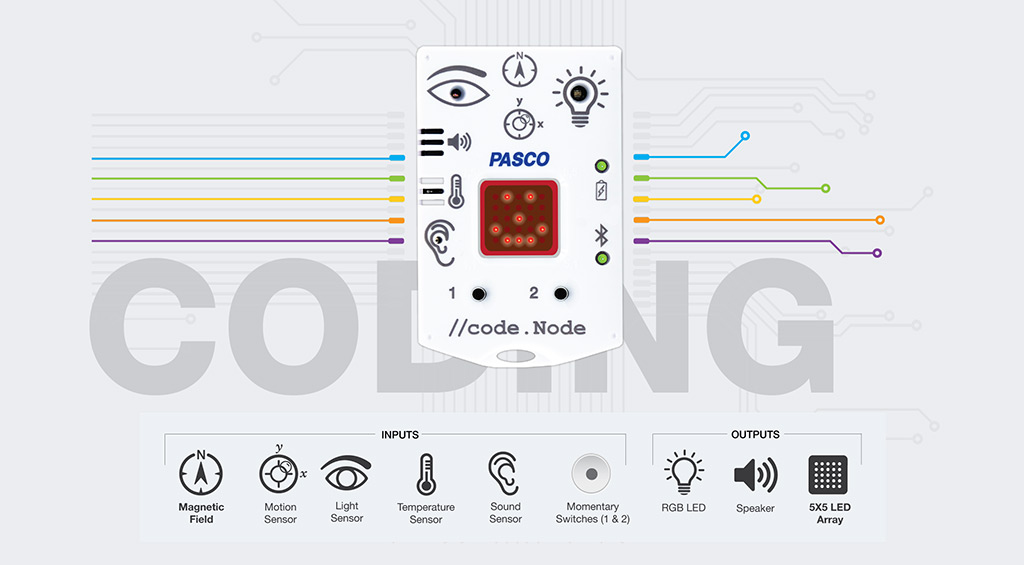
The //code.Node has six built-in sensors, including a Temperature Sensor, Motion Sensor, Magnetic Field Sensor, Sound Sensor, Light Sensor, and two Momentary Switches. The //code.Node’s four device outputs include a Speaker, 5×5 LED Array, and RGB LED Light. The user-friendly coding platform, Blockly is used within SPARKvue or Capstone software to program how the device collects and responds to data. Students can control how the //code.Node’s sensor inputs collect and display data, as well as how the device’s outputs respond to incoming sensor data.
Sensor Inputs:
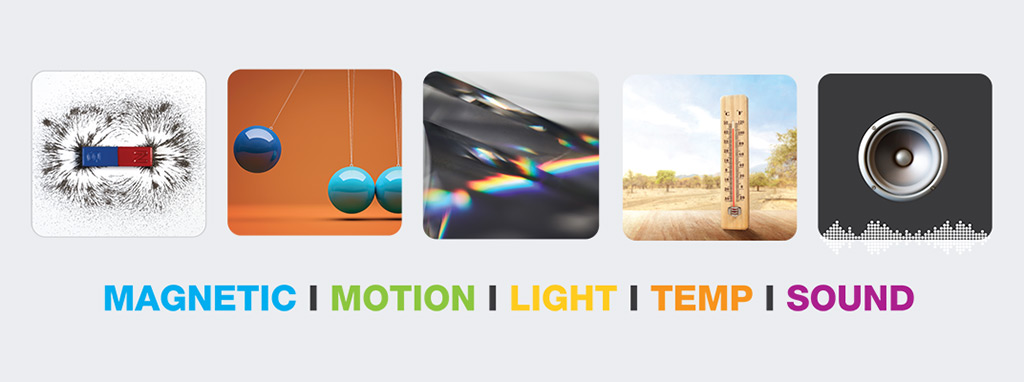
- Light Sensor – Measures ambient light levels in both indoor and outdoor environments
- Magnetic Field Sensor – Measures the strength and polarity of magnets and magnetic fields.
- Motion Sensor – Measures acceleration to determine if the //code.Node is moving
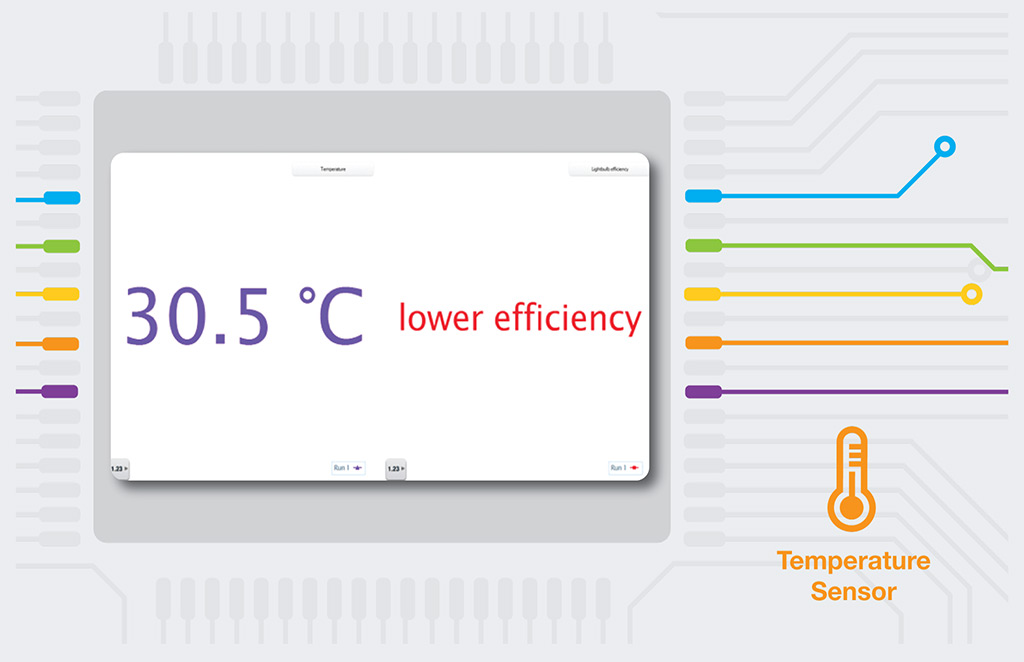
- Temperature Sensor – Measures ambient temperature from inside the //code.Node
- Sound Sensor – Measures air pressure levels to determine the surrounding sound level
- Momentary Switches – Function as on and off switches for programmed instructions
Device Outputs:
- RGB LED Light – Can be programmed to combine red, green, and blue light of different intensities to make any color
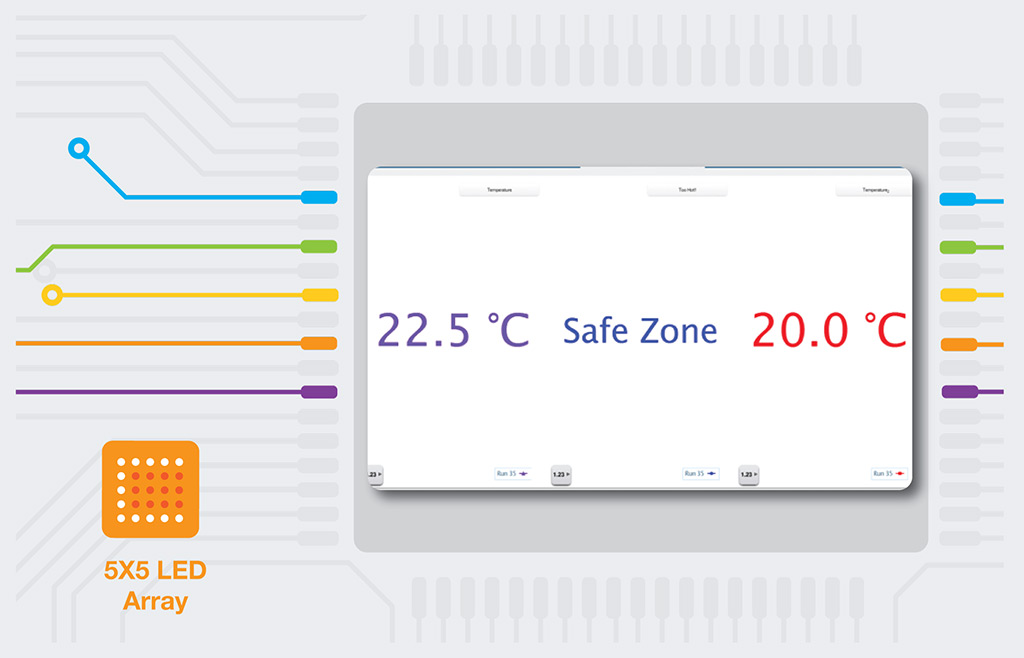
- 5×5 LED Array – Can illuminate each light at various levels of brightness to display letters, numbers, and symbols
- Speaker – Can be programmed to produce sound in response to stimuli including phenomena, data, and code
- Text – The //code.Node is compatible with SPARKvue and Capstone text displays, allowing students to receive real-time feedback from both the software and the //code.Node device.
Experiment Library
Perform the following experiments and more with the //code.Node.
Visit PASCO’s Experiment Library to view more activities.
- Clap On
- Magnetic Polarity
- Investigating Sound Levels
- Digital Thermometer
- Intruder Alarm
- Light Bulb Efficiency
- Random Number Cube
- What’s the Origin?
- Step Counter
Code with Confidence with Blockly and //code.Node
The //code.Node brings the fun of coding activities to our user-friendly data collection software to create a programming platform unlike any other. The integration of Blockly into SPARKvue and Capstone introduces a streamlined solution, where students can code, debug, collect and analyze data all in one, collective space.
Programming the //code.Node is so simple that it makes every beginner feel like a pro. Blockly gives students a visual coding environment where they can confidently develop their skills, without unintended distractions. As their confidence grows, they can explore Blockly’s expansive applications to create their own data-based feedback loops including songs, light displays, and more.
Bring the Excitement of Coding to Data Collection and Analysis
The //code.Node closes the gap between DIY coding projects and data collection and analysis, allowing you to satisfy more standards with fewer tools. Unlike some coding solutions, the //code.Node is a scalable model for learners of all levels. Its five sensors and three output signals enable students to program how the device collects and responds to data. New learners may program the //code.Node’s colored LEDs to light up when the room goes dark, while more advanced programmers might program the RGB LED to flash different colors when a specified temperature range is detected. With its simple design and cross-concept applications, the //code.Node makes it easy to get students excited about coding and data collection.
Getting Started
Skill Development
Computational Thinking and Emotional Learning
The //code.Node employs design thinking and problem solving to nurture the development of computational thinking foundations. As students progress through //code.Node lessons, they’ll be challenged to create their own pathways to success. After creating a program, the code is executed using the record button. If the correct data or signal is obtained, then the code is a success. If the outcome is not as expected, then the student knows to begin debugging their code.
As they learn to code with sensors, students will develop emotional skills, such as overcoming failures through perseverance and cooperation. Coding challenges encourage collaboration among students, as some students discover working methods sooner than others. As the class progresses, students will learn to rely on one another’s strengths to create better outcomes. Additionally, this allows educators to listen in on class discussions and reasoning while they work to find solutions.
Data Science: Closing the Gap Between Programming and Data Literacy
Today, most programmers create websites, forms, and other content. In the future, these types of programming jobs will likely be automated, and as a result, most programmers will work in data science. While the global demand for data scientists continues to grow, most educational coding solutions fail to bridge the gap between programming and data literacy. The //code.Node integrates data collection into the programming process to provide an unparalleled platform for developing early foundations in both computational thinking and data science.
Data Visualization, Collection, and Analysis with //code.Node
The //code.Node integrates data visualization with programming using our award-winning data collection and analysis software. After successfully programming sensor commands, students can visualize their data using any of the display options within SPARKvue or Capstone. These displays encourage students to practice visualizing data and selecting appropriate graph formats, while also fostering curiosity and excitement about data science.
With the //code.Node, it’s easy to pair coding lessons with engaging analysis activities. After programming instructions for their device and collecting data, students can use SPARKvue or Capstone to analyze their findings. With tools for basic and advanced calculations, both platforms are well-suited for students of all ages. Younger students can easily find the minimum, maximum, and mean of their data, while older students can utilize advanced calculation tools for their applications. After analyzing and interpreting their code-derived data sets, students can use their findings to inform future coding decisions.
Sample Applications
Entry Level Programming: Measuring the Efficiency of Lightbulbs
In this activity students use the //code.Node’s temperature sensor to measure the heat radiating from lightbulbs and use their data to determine which lightbulb is most efficient. To make this lesson impactful, we encourage the class to have a group discussion about lightbulbs, heat, and energy consumption. Once students understand that lightbulbs vary in efficiency, they can begin programming instructions for the //code.Node’s internal temperature sensor. A successful program will generate real-time temperature data when executed using the record button. Then, it’s time to test the lightbulbs. Students can take turns holding their //code.Nodes near powered LED and incandescent lightbulbs. As they monitor their code’s performance, students should be able to determine which lightbulb produced the most heat. Finally, they should be able to determine which lightbulb is the most energy efficient.
Mid-Level Programming: Create an Anti-Scald Device
In this activity, students are introduced to a chart depicting safe and unsafe bathing temperatures and a group discussion is used to convey the lesson’s real-world applications. Students should be able to identify which water temperatures are safe using the chart. Next, the class is asked to program directions for their Wireless Temp Sensors and //code.Nodes to measure water temperatures. The 5×5 array on the //code.Node is programmed to display an “H” when the water is hot, and a “C” when the water is safe. Then, the RGB LED is programmed to display a red light when the water is too hot, and a blue light when the water temperature is safe. Finally, students program a text display that indicates whether the current water temperature is too hot or safe. Successful programs will generate real-time temperature data, a text description of the water’s safety, and corresponding //code.Node RGB LED and 5×5 array signals. This experiment is a fun, simple way to get students excited about coding input-output relationships.
High-Level Programming: Create an Anti-Theft Device
This open activity invites students with an understanding of programming to express their creativity with a real-world application. In this scenario, students are asked to create an anti-theft device that deters thieves from getting away with the //code.Node. While there are various ways to achieve this, our example utilizes the //code.Node’s accelerometer, speaker, RGB LED, 5×5 array, and momentary switches. Students begin by estimating the accelerometer’s sensitivity to various walking speeds. They should ask themselves questions such as: how fast should a thief be moving to signal the accelerometer? Should the anti-theft signals be delayed? How can the anti-theft system be turned on and off?Students might program the //code.Node speaker to sound an alarm when the accelerometer reaches a specified threshold. They can even program the alarm to increase in frequency as the thief increases their speed! To further deter the thief, students can program the RGB LED to flash and the 5×5 array can be encoded to indicate the device’s status. When stationary, the array can display an image such as an unlocked lock or smiley face. Once the thief is in motion, the 5×5 array can change to an alternative image. Finally, students can program the momentary switches to serve as on and off buttons for the anti-theft signals. This activity employs design thinking, cooperation, computational thinking, and problem-solving skills in a format that engages today’s digitally literate students.
Product Specifications
| Light Level Sensor Range | Visible Spectrum (400 nm to 700 nm) |
| Light Level Sensor Sensitivity | Approximately 600 lx to 50,000 lx (not calibrated) |
| Sound Level Sensor Sensitivity | Approximately 70 dB to 100 dB (not calibrated) |
| Magnetic Field Sensor Range | ±50 gauss |
| Acceleration Sensor Range | 2-axes, ±8 g |
| Ambient Temperature Range | -25°C to 40°C |
| Ambient Temperature Resolution | 0.05°C |
| Ambient Temperature Accuracy | ±1°C |
| Maximum Sample Rate | 100 Hz |
| Momentary Push Buttons (2) | On/Off |
| Speaker Output Frequency Range | 10 Hz to 10,000 Hz |
| Multi-color LED | Independently adjust intensity of Red, Green, Blue |
Battery & Logging
| Rechargeable Battery | |
| No logging available |
1 Minimum # of data points with all measurements enabled, actual results depend on enabled measurements.
2 Continuous use in a connected state until battery failure, actual results will depend on sample rate, active measurements, and battery condition.
3 Logging until battery failure, actual results will depend on sample rate, active measurements, and battery condition.
* Normal classroom use is the sensor in active use for 20min/lab for 120 lab periods/yr.
Recommended Accessories
| Wireless Sensor Charging Station | PS-3599 | |
| //code.Node Holder | PS-3233 | |
| //code.Node Cart | PS-3235 | |
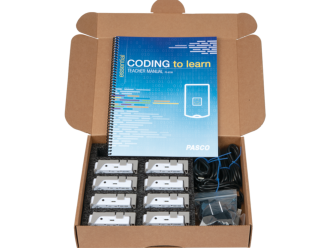
| Essential Coding to Learn Teacher’s Manual | PS-6338 |
Replacement Parts
| Micro USB Cable | PS-3584 |
Also Available
| USB Bluetooth Adapter | PS-3500 | |
| //code.Node Solution Set | PS-3316 | |
| //code.Node Multi-pack (Set of 8) | PS-3311 |