SPARKvue is now completely free as a browser-based application!
We’re excited to announce SPARKvue is now available free of charge on all your devices as a browser-based application.
This new version of our software as a Progressive Web Application (PWA) means you have free access to all the features of SPARKvue from Google Chrome and Microsoft Edge browsers. That’s right: No download fees, subscription fees, or update fees, even for Windows® and Mac®. Plus, the app is always updated to the latest version automatically, so you never have to worry about it.
Access SPARKvue from your Google Chrome and Microsoft Edge browser from any device–online or offline–and start collecting data with three simple steps:
- Open Browser
- Download SPARKvue
- Connect PASCO Sensors
Try SPARKvue in your browser today!
Watch the video below to get started:


SPARKvue (PWA) is designed for use on laptops, computers, and Chromebooks. To download SPARKvue for your iPhone or iPad, download the free SPARKvue app on the App Store. For Android devices, get SPARKvue on Google Play. Skip to the article section, Free Apps for Android and iOS Devices, for links to download SPARKvue to your mobile device.
System Requirements
Windows
- Windows 10 or later
- Processor: Intel i3 1st Gen (or equivalent) or later
- RAM: 4GB or greater
- Disk Space: 349 MB
- Resolution: 1024 x 768 or higher
Mac
- Mac OS v 10.14 or later
- Processor: Intel i3 1st Gen (or equivalent) or later, or Apple M1 (using Rosetta 2)
- RAM: 2 GB or greater
- Disk Space: 504 MB
- Resolution: 1024 x 768 or higher
Chromebook
- It is recommended to be on the latest OS the machine supports
iOS
- iOS v13 or later. Compatible with iPhone, iPad, and iPod touch.
Android
- Android v7.1 or later. Compatible with tablets or phones.
Free Apps for Chromebook, Android, and iOS Devices
These free SPARKvue apps provide the complete software install so that the user experience is the same regardless of platform. Updates for these apps are handled via direct notification and installation on your device, including SPARK LX/LXi users.
Chromebook Devices
Get SPARKvue for Chrome OS devices in the Chrome Web Store.

Android Devices
Get SPARKvue for Android based phones & tablets on Google Play.

iOS Devices
Get SPARKvue for Apple iPhones & iPads in the App Store.

Sideloading on Android
Android users who do not have access to Google Play may optionally sideload the application by downloading the SPARKvue APK and following this Knowledge Base article. This includes updating SPARKvue on PASCO’s SPARK LXi/LX Dataloggers.
Need the 64-bit installers for Windows and Mac for a local installation? Click here.
In-app Updates for Windows® and Mac® Computers
Existing users of SPARKvue on Windows and Mac computers may update to the latest version using the in-app update feature. Simply launch the SPARKvue application and choose “Check for Updates” from the file menu to get started.


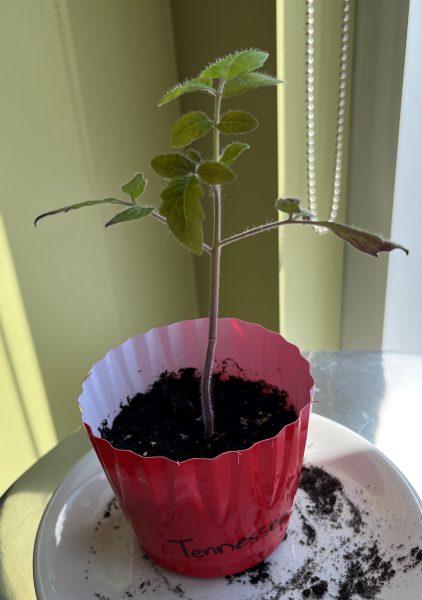
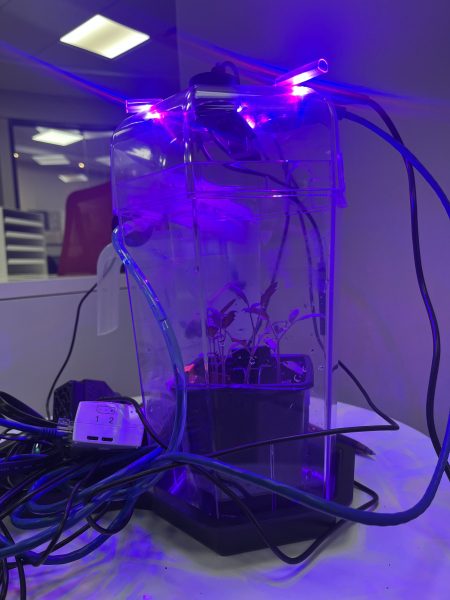
 After just one week of being inside the Greenhouse, three out of six seeds germinated and sprouted! As a couple more weeks went by, two more seeds sprouted. Unfortunately, one seed (on the T side) did not germinate. Overall totaling three plants on the U side, two on the T side. At this point, we hypothesized which of the seeds had been to space and which had not, and wrote down our predictions to compare to the results later on. You can share your predictions in the survey at the bottom of this post, and find out which seeds were the space seeds!